Parts List:
First off, I want to thank Shawn (from Charter.net) from CMPL for the pointers & advice before I started.
I started with the Autometer Pod, model #20692. This pod is for the 1999 Camry and newer. I didn't know which one to try, so I figured at least it was for a Camry...how far off could it be? Well, I found out later that the pod for the 1994 Honda Accord is a much closer fit. So if you're just starting out, get that one...not the one I got!
When I removed my trim piece from the pillar, I landed up breaking the plastic mounts for the upper retaining clip. So be careful when you are pulling out the trim.
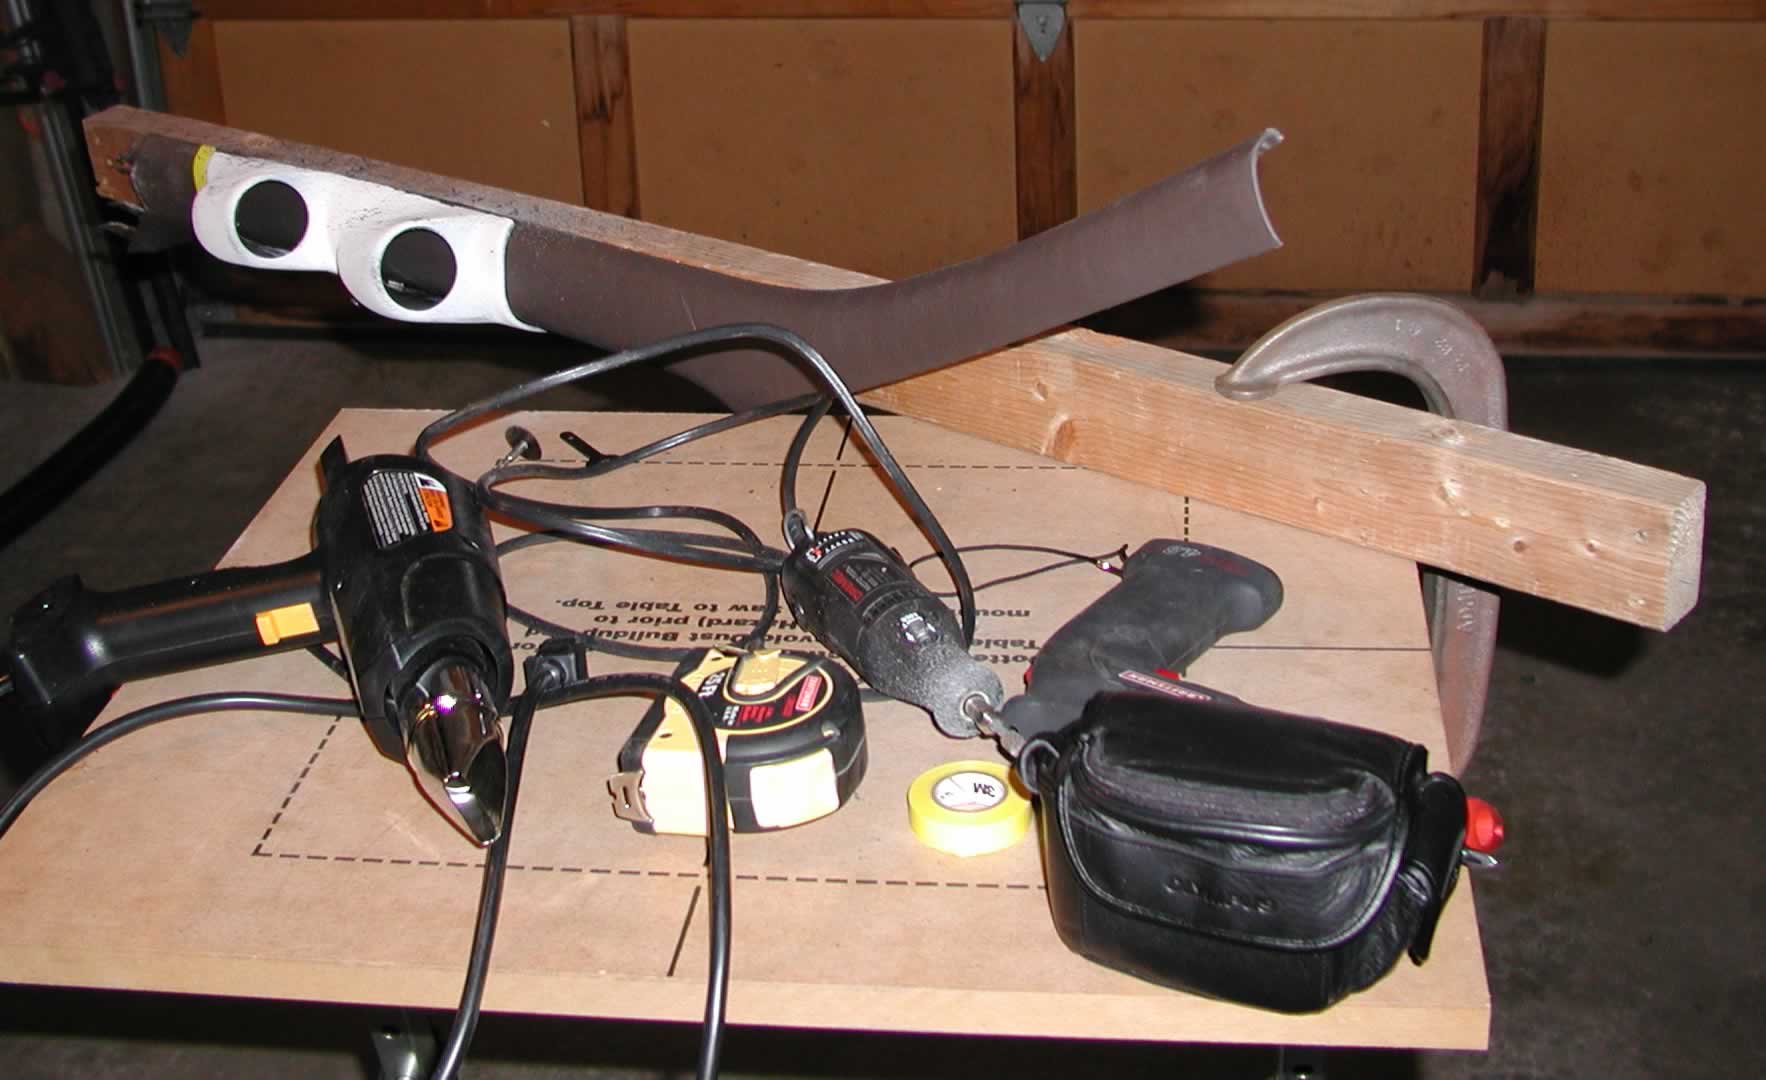
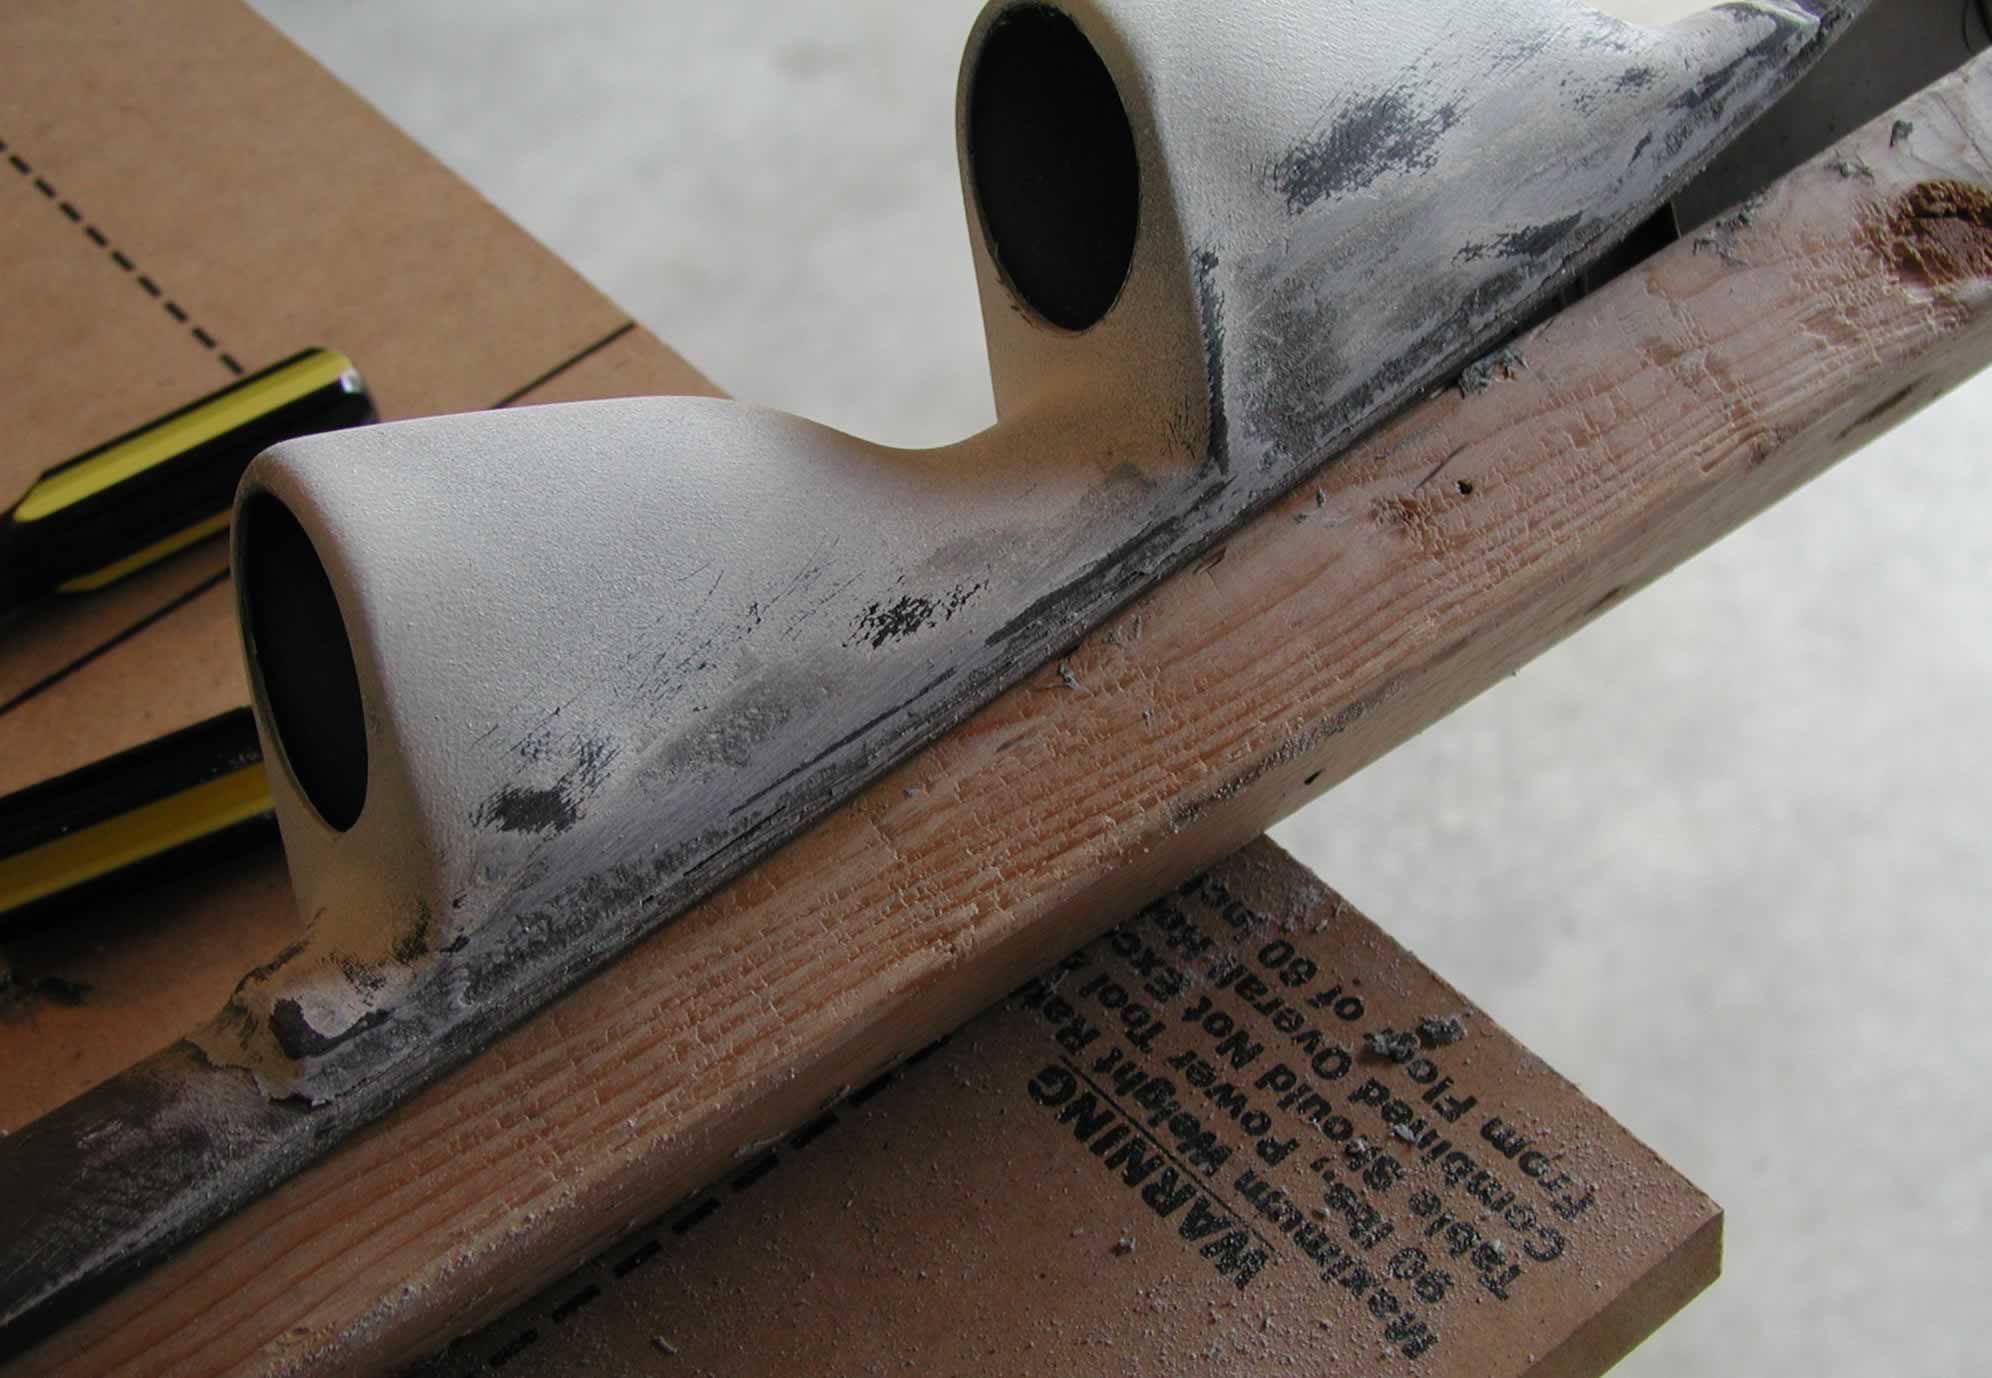
Anyway, below is a picture of the start of the project, showing how I mounted the original pillar trim and the Autometer pod on a scrap 2X3 I had. When you attach the parts to the wood, be sure to not distort the plastic out of it's normal shape.
Mounting it on solid piece of wood gives you the stability you need to work on the pod. To mount it, just hold the pod and the trim in place and drill a small hole right through both parts. Then insert a wood screw (I used 2" drywall screws). In the picture you can see the heat gun and the Dremel tool I used to custom fit the pod.
When I started, I decided where I wanted the pod. I measured a reference point from the top and put some yellow electrical tape to help while securing the pod to the wood:
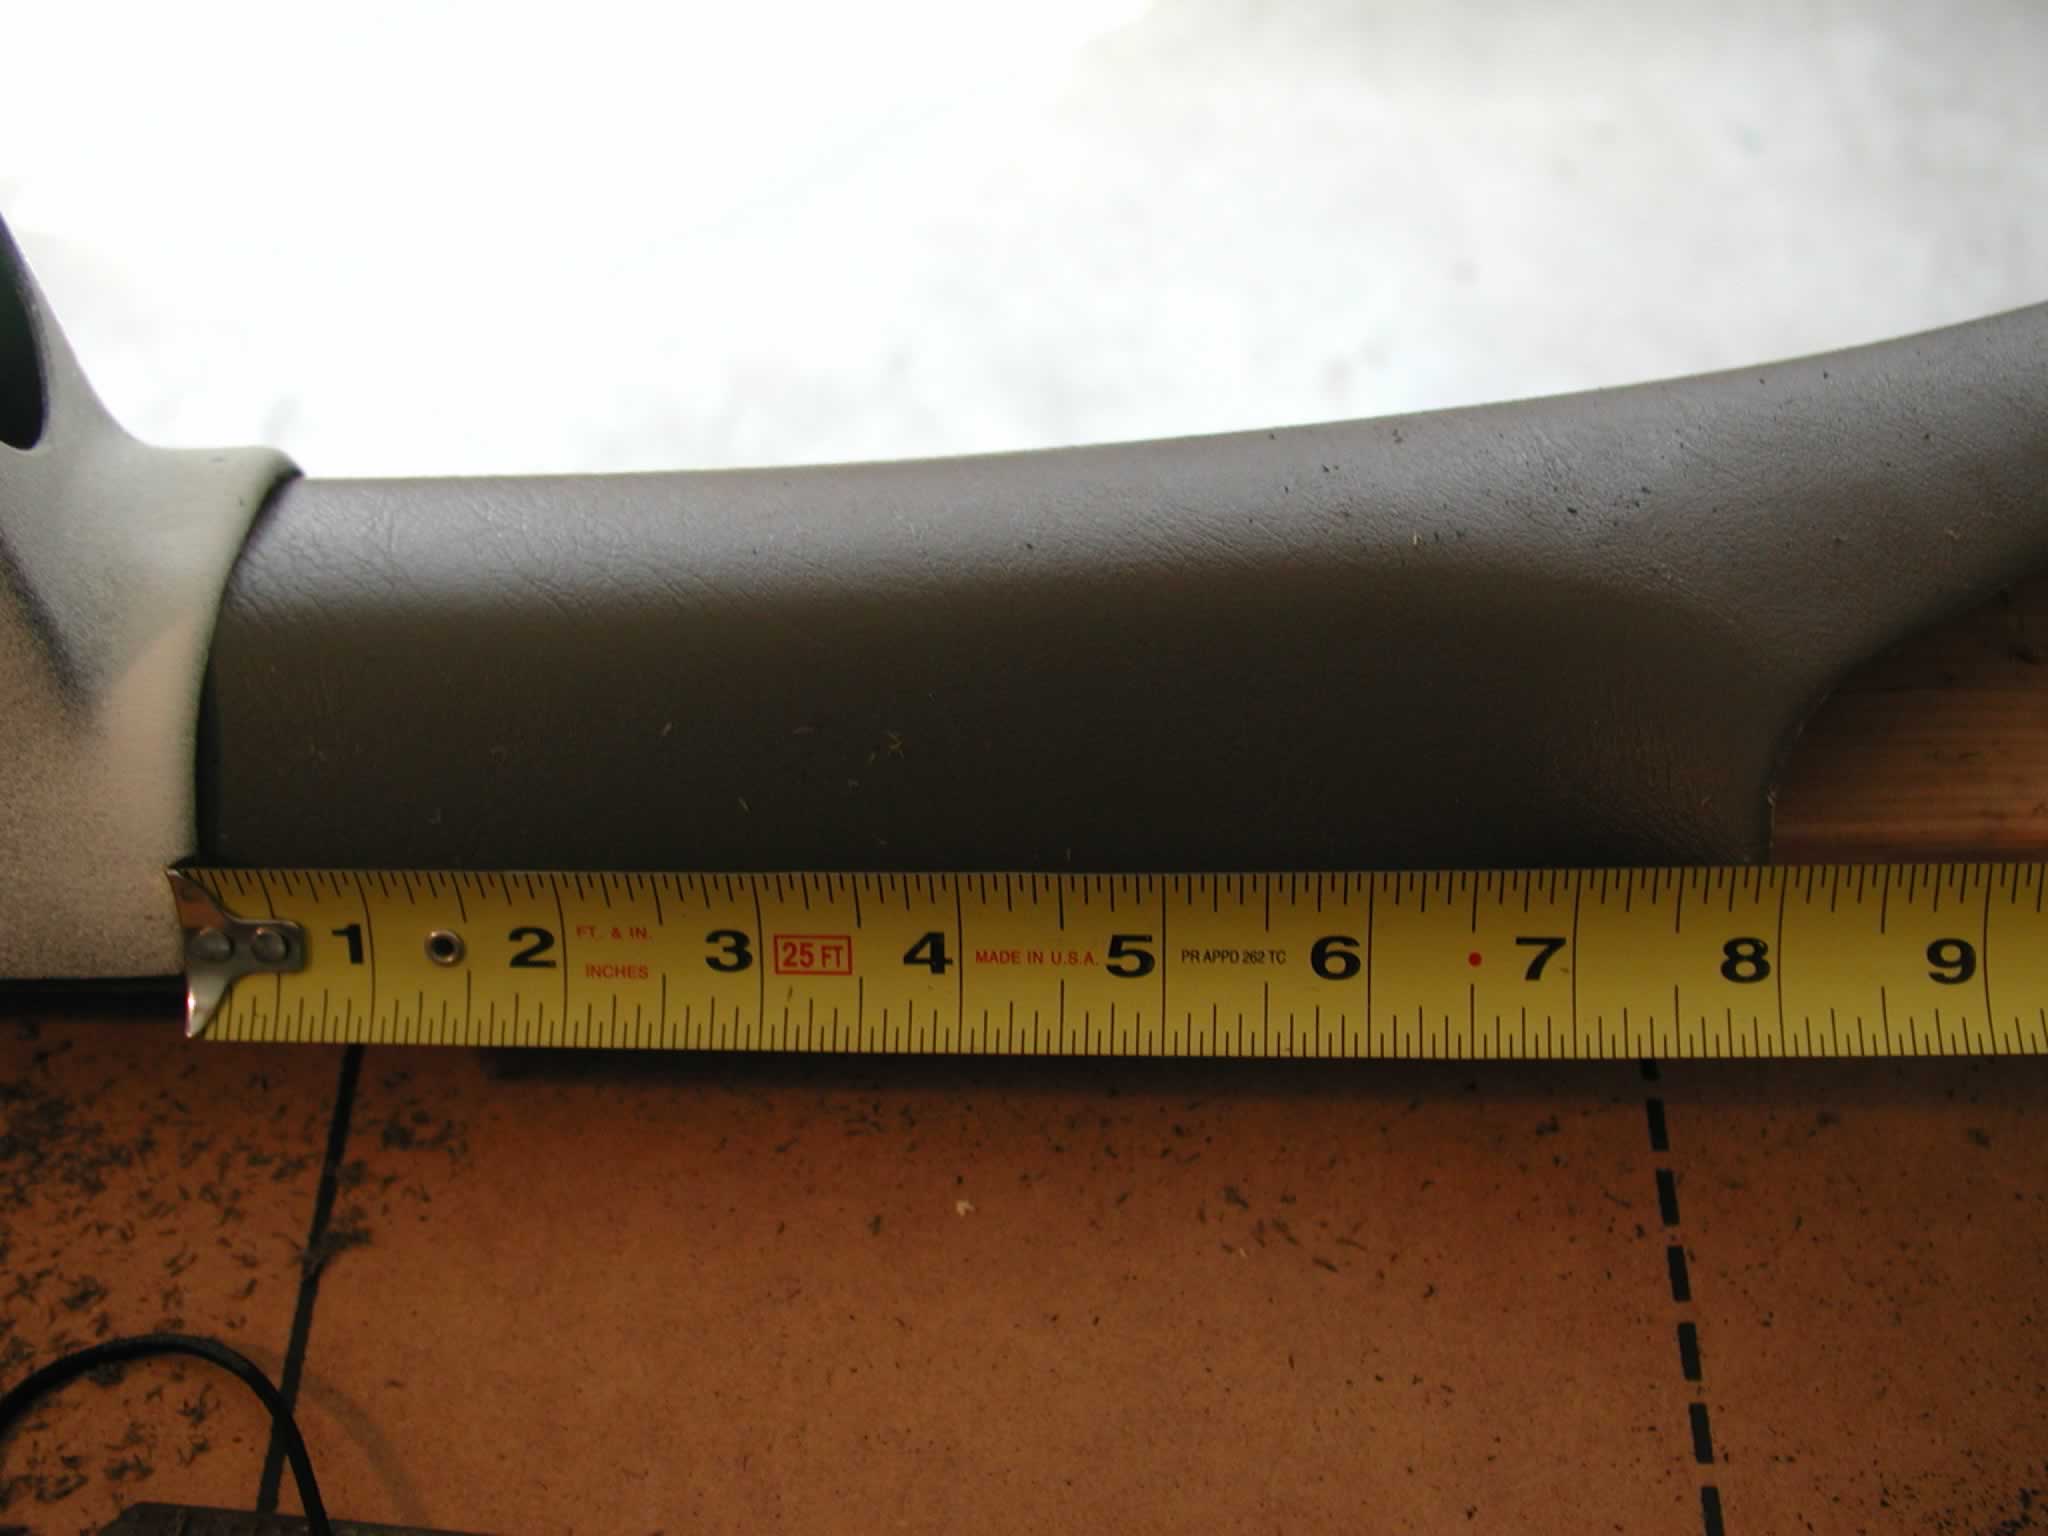 Although it's kind of hard
to see in the picture, I measured 8" from the top of the pod to the point
at which the trim changes to the horizontal piece that runs above the door.
(Sorry for the bad picture)
Although it's kind of hard
to see in the picture, I measured 8" from the top of the pod to the point
at which the trim changes to the horizontal piece that runs above the door.
(Sorry for the bad picture)
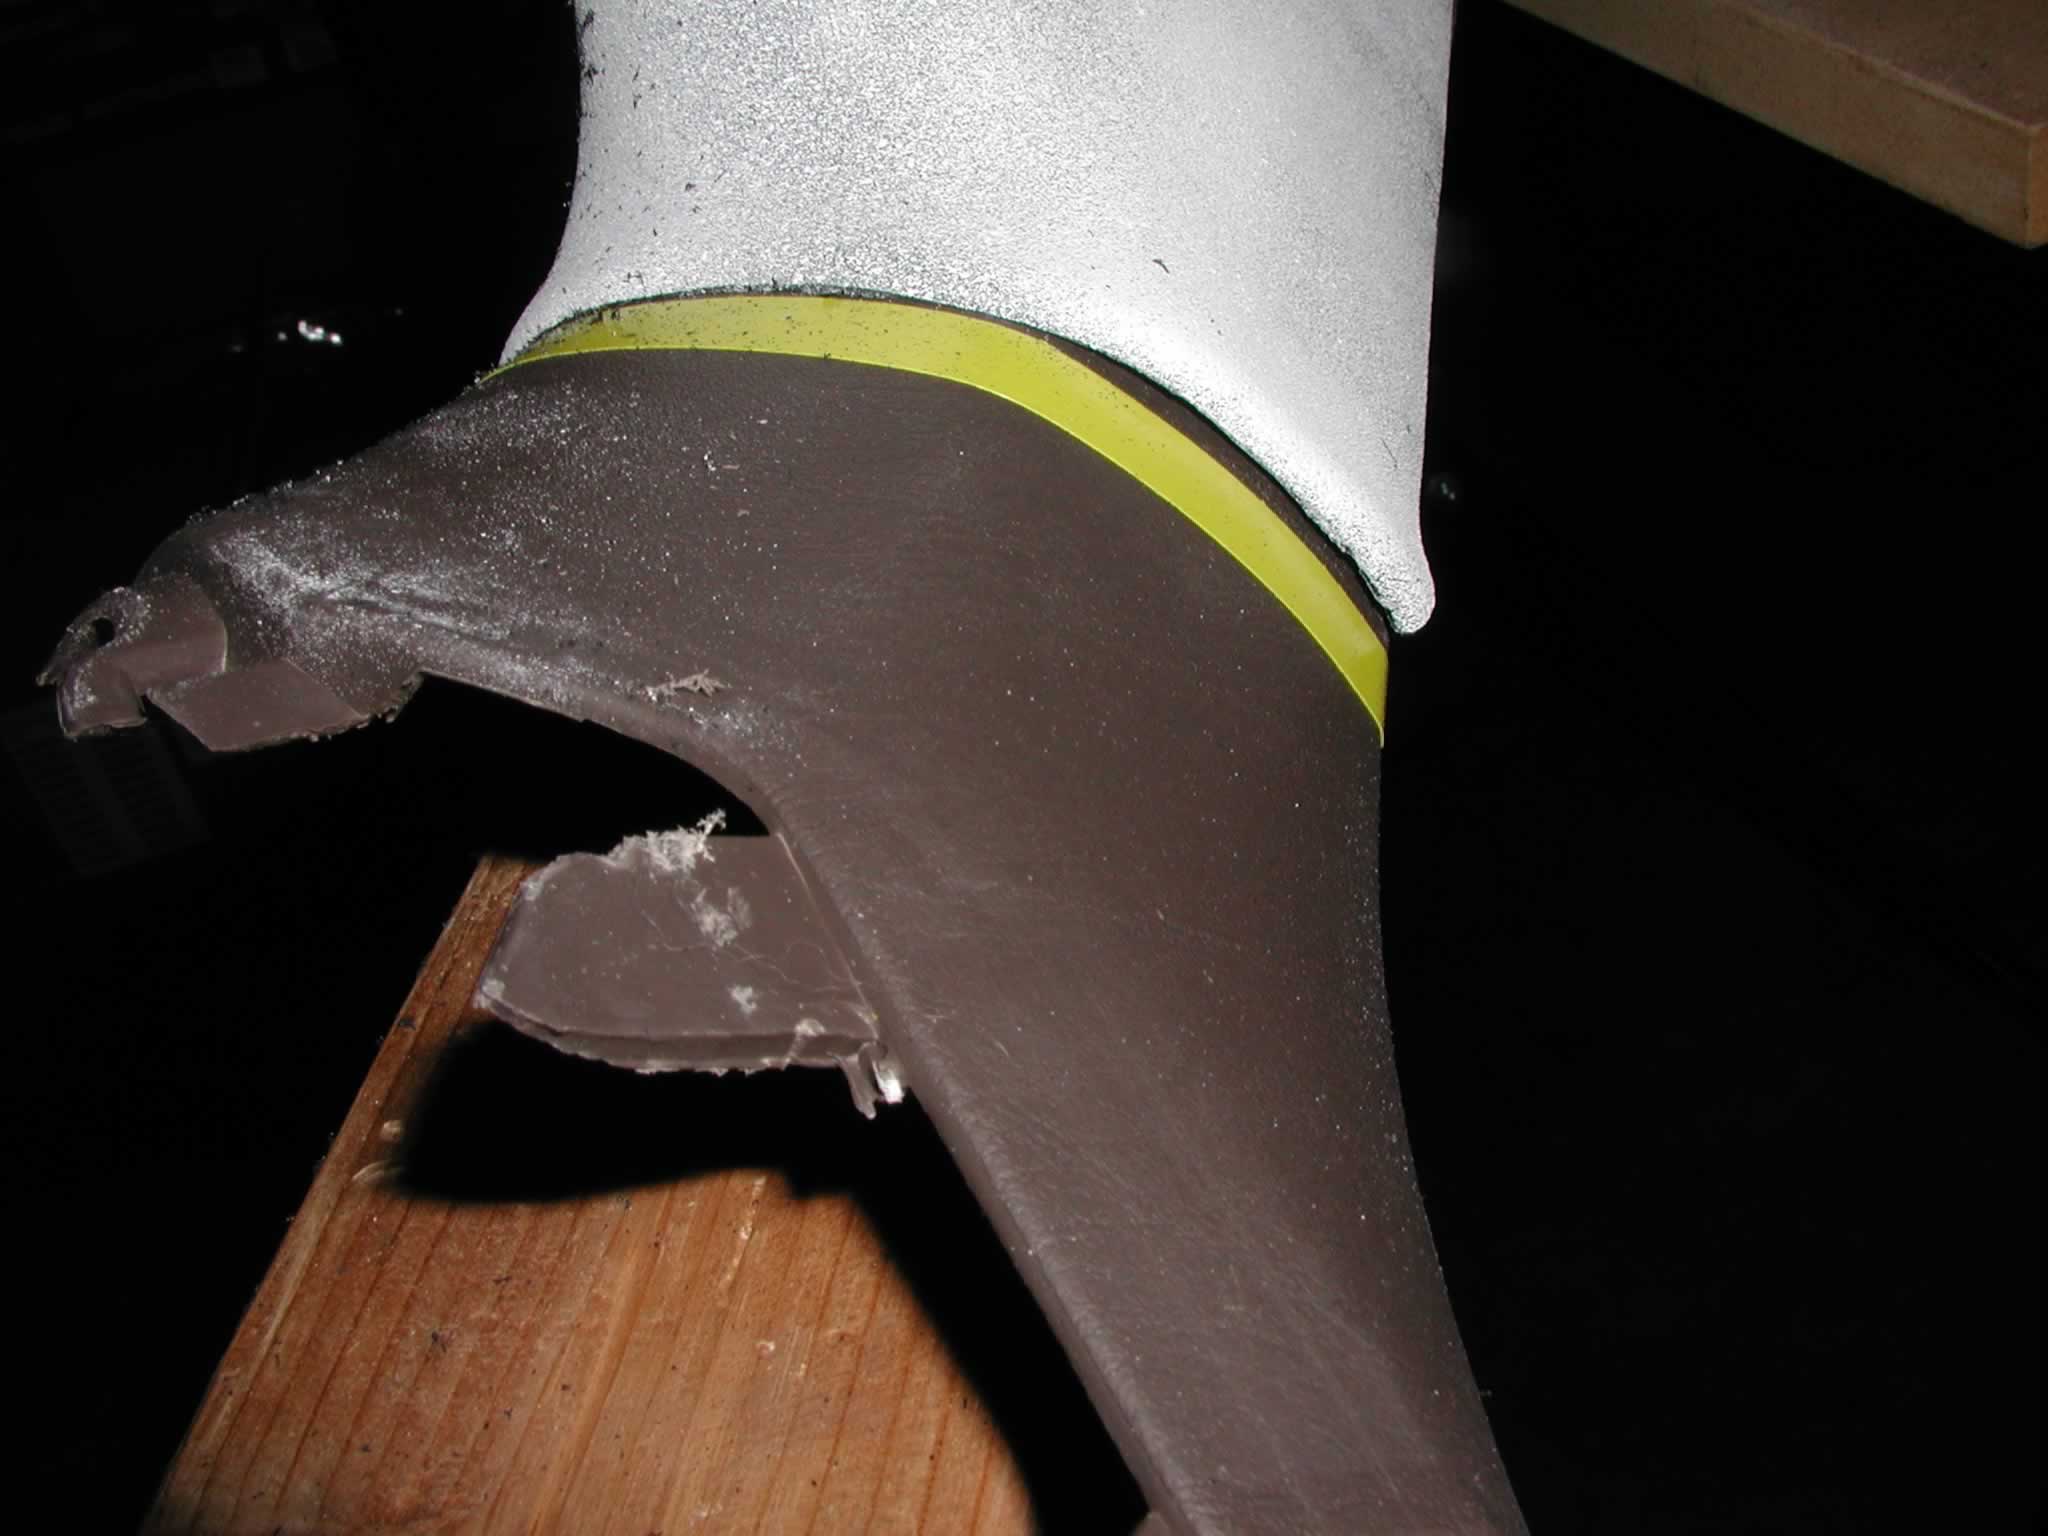 At this point, I added the
yellow eletrical tape to act as a reference point at the bottom of the pod.
Then I began shaping the Autometer pod to match my trim better. You can see
this in the above picture. When I first test-fit the pod, it didn't fit this
well at the bottom.
At this point, I added the
yellow eletrical tape to act as a reference point at the bottom of the pod.
Then I began shaping the Autometer pod to match my trim better. You can see
this in the above picture. When I first test-fit the pod, it didn't fit this
well at the bottom.
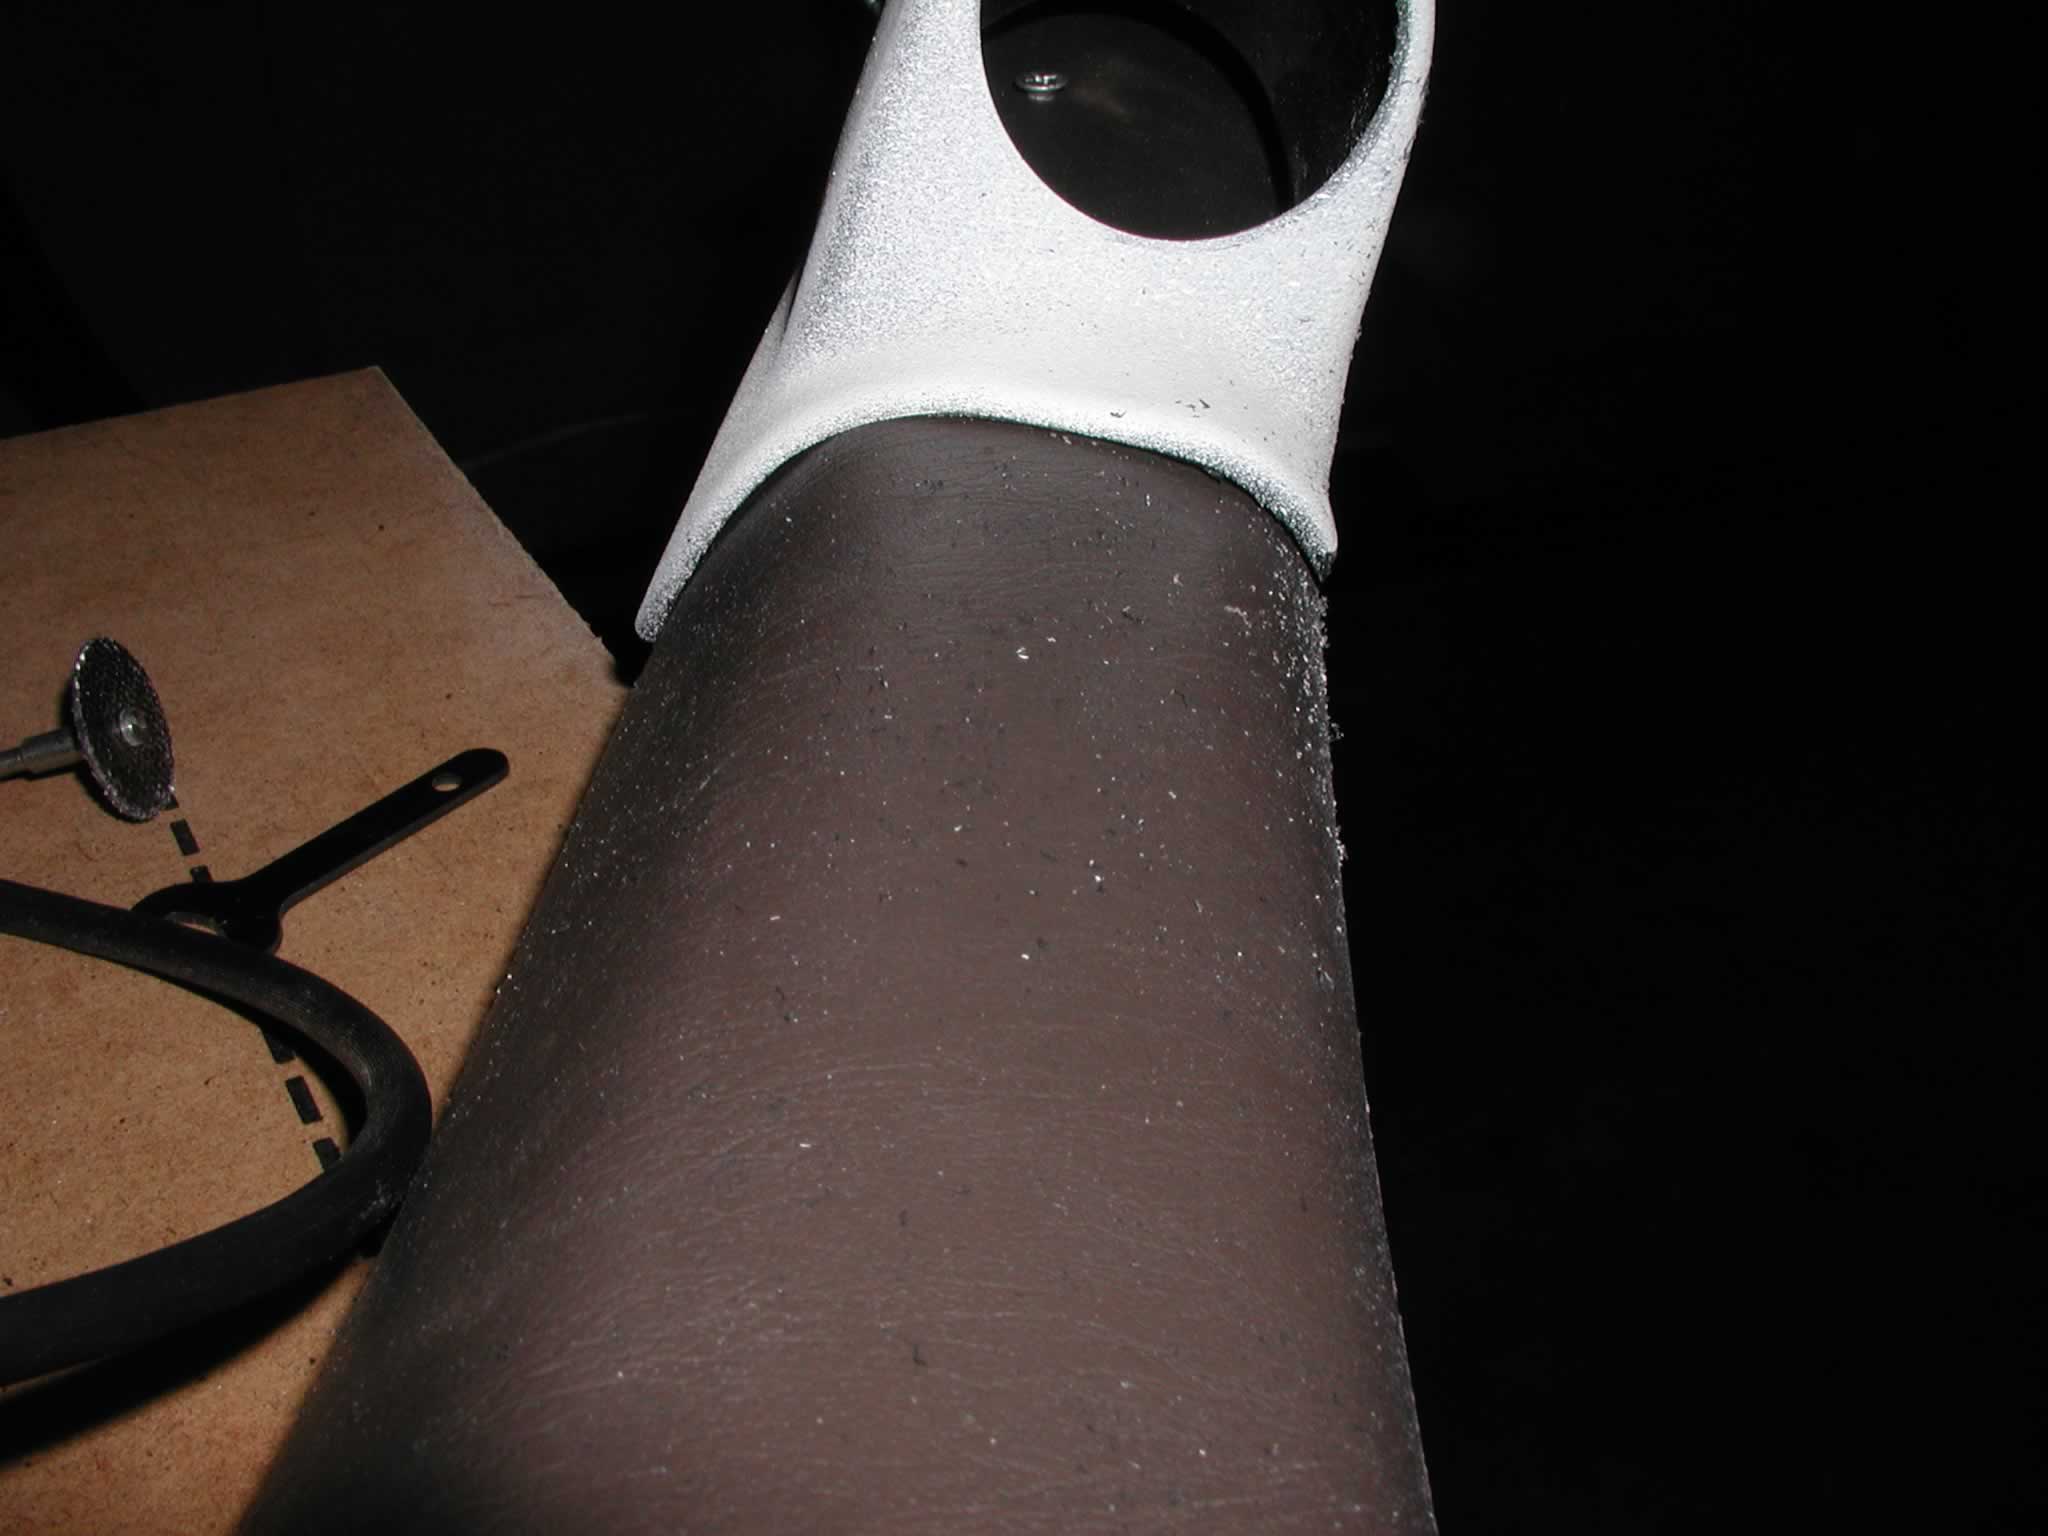 Here's a picture of the top
end after using the heat gun to reshape it.
Here's a picture of the top
end after using the heat gun to reshape it.
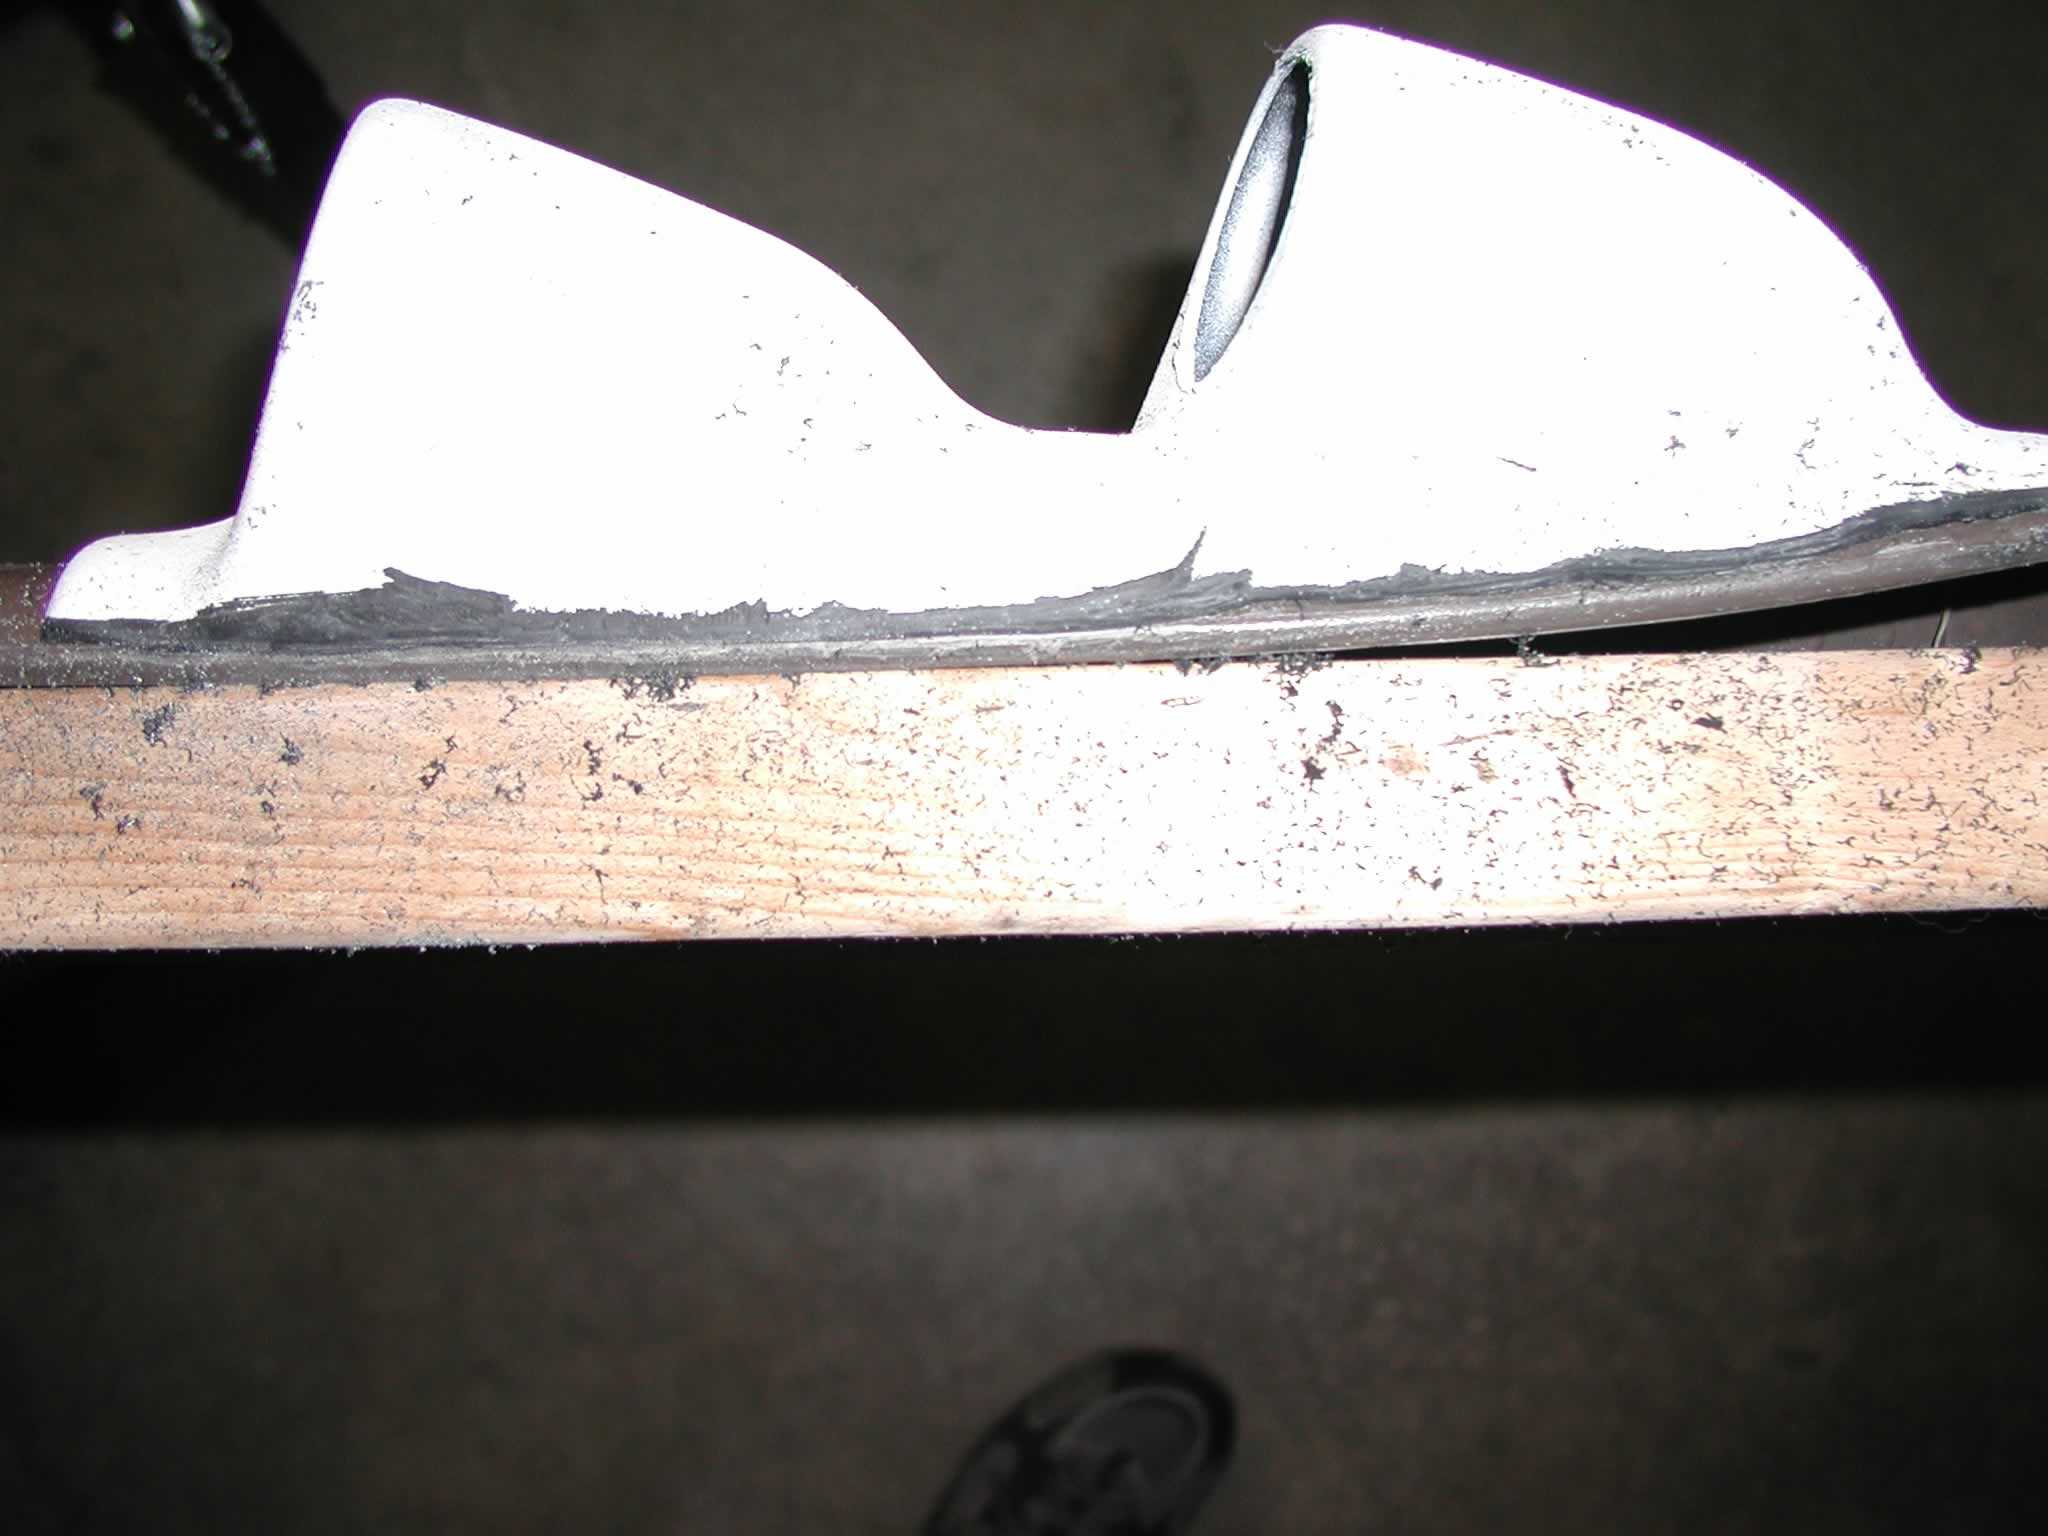
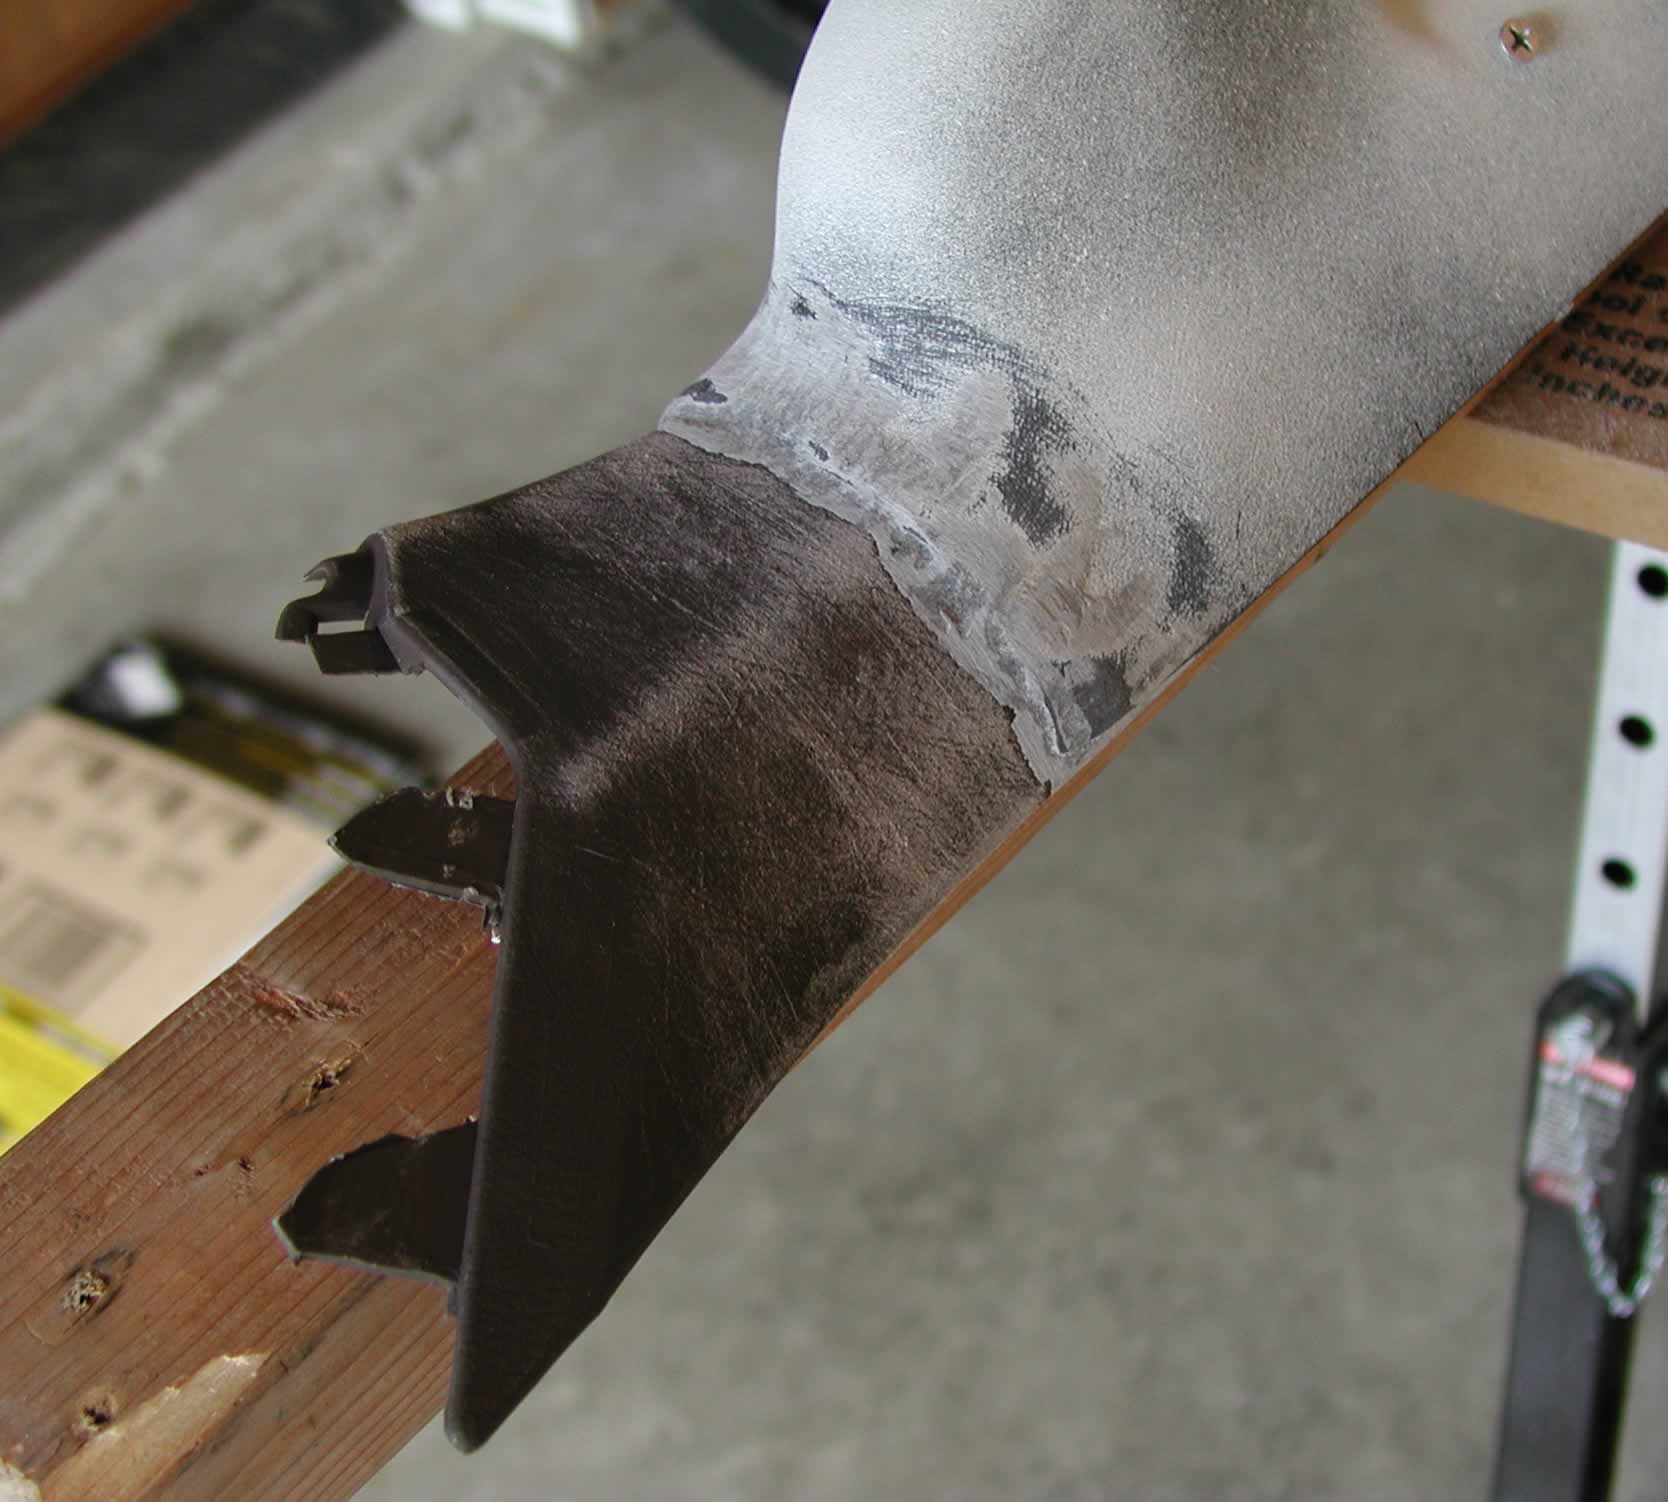
As part of the fitting process, I not only reshaped the pod with the heat gun, but I used the Dremel to trim the excess away from the pod to fit the trim:
 As you can see, I cut away
alot of the pod to make it fit the stock trim piece.
As you can see, I cut away
alot of the pod to make it fit the stock trim piece.
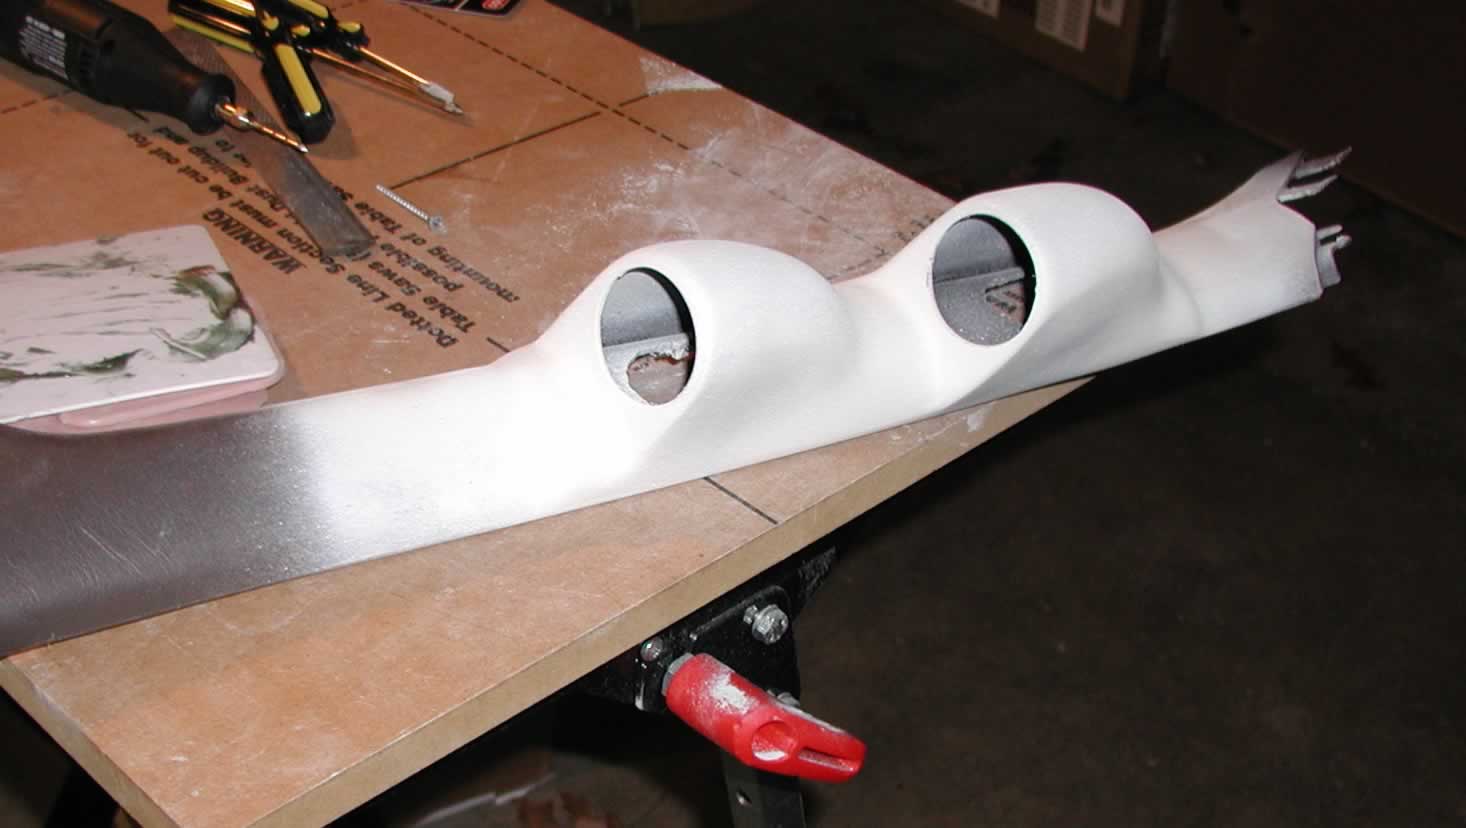
Once I got the pod molded with the Dremel & heat gun so it fit nicely, I removed the pod from the pillar trim and the wood. I then cut the holes for the wires to run through.
As you can see in the next picture, the edge didn't look exactly pretty:
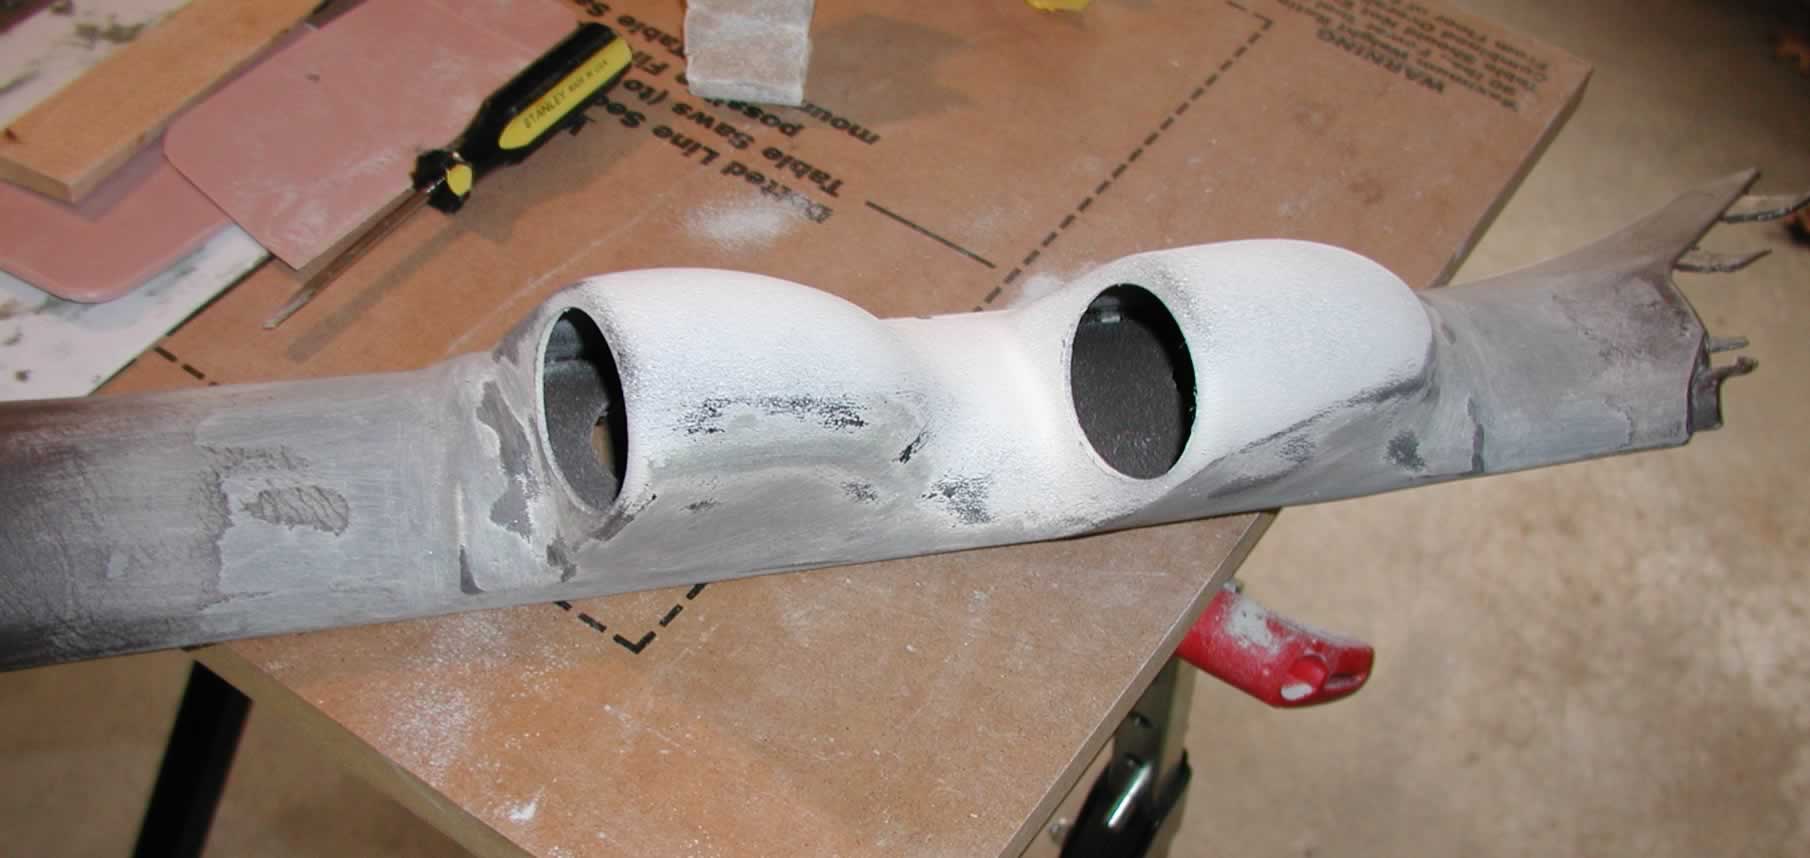
 By the way, my pod is kind
of white because of the primer that I tested on the pod before I ordered the
custom colored paint. The guy that was matching the paint said to first prime
the plastic piece. This would make sure the paint would adhere properly.
By the way, my pod is kind
of white because of the primer that I tested on the pod before I ordered the
custom colored paint. The guy that was matching the paint said to first prime
the plastic piece. This would make sure the paint would adhere properly.
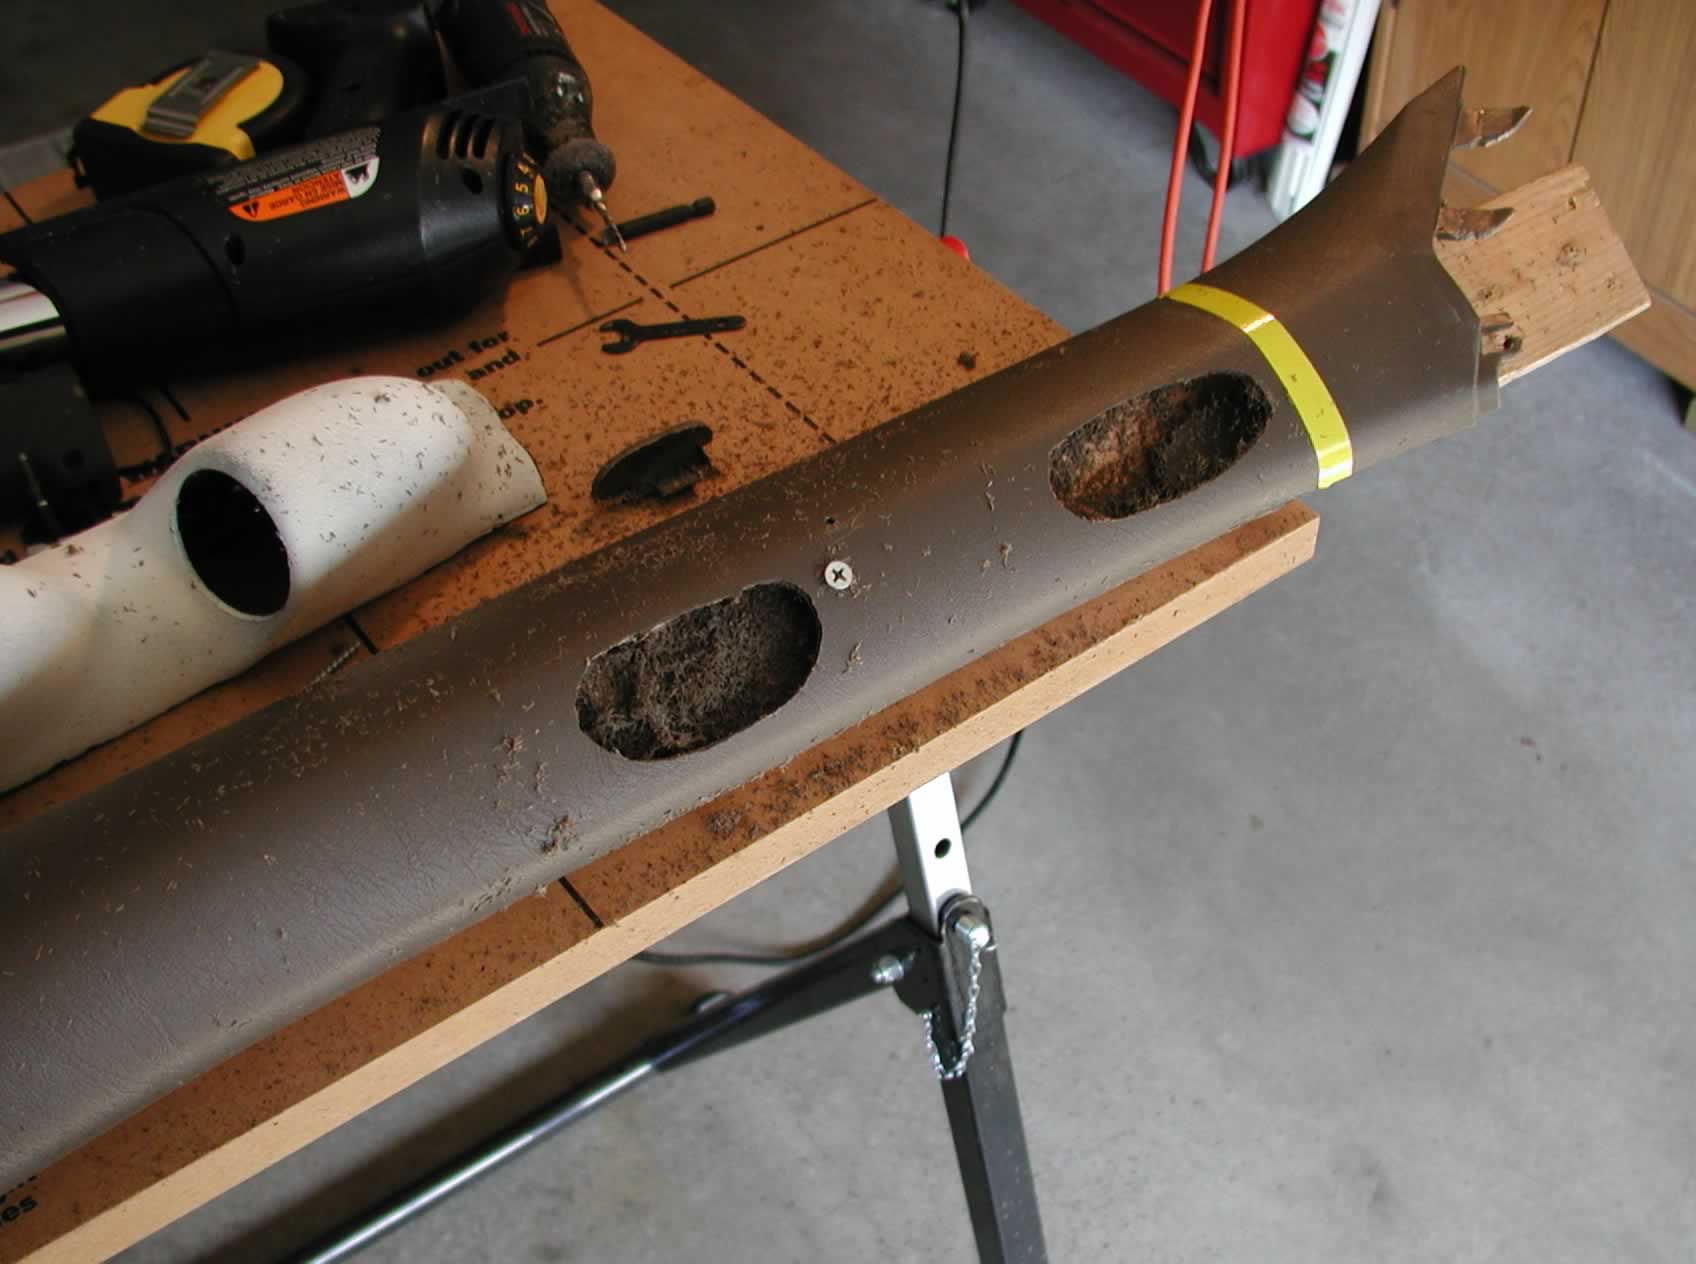 Be careful, though! When
you cut, know what you're cutting on the other side. I landed up cutting one
of the two clip anchors that hold the trim piece in place. I cut out the lower
one. I still have the fingers at the bottom of the trim and the upper clips
on the horizontal, so I hope this going to work OK! I used the Dremel tool to
cut the holes out.
Be careful, though! When
you cut, know what you're cutting on the other side. I landed up cutting one
of the two clip anchors that hold the trim piece in place. I cut out the lower
one. I still have the fingers at the bottom of the trim and the upper clips
on the horizontal, so I hope this going to work OK! I used the Dremel tool to
cut the holes out.
Now reattach the pod to the trim with another screw to hold everything in place. Next we need to mic up some fiberglass Bondo to smooth out the edges. Once this is mixed according to the manufacturer's directions, work fast. This stuff really does begin to harden quickly!

As you can see, my first pass at using the fiberglass body filler didn't really look that good. But it does get better!!
 After another coat, it started
looking better!
After another coat, it started
looking better!
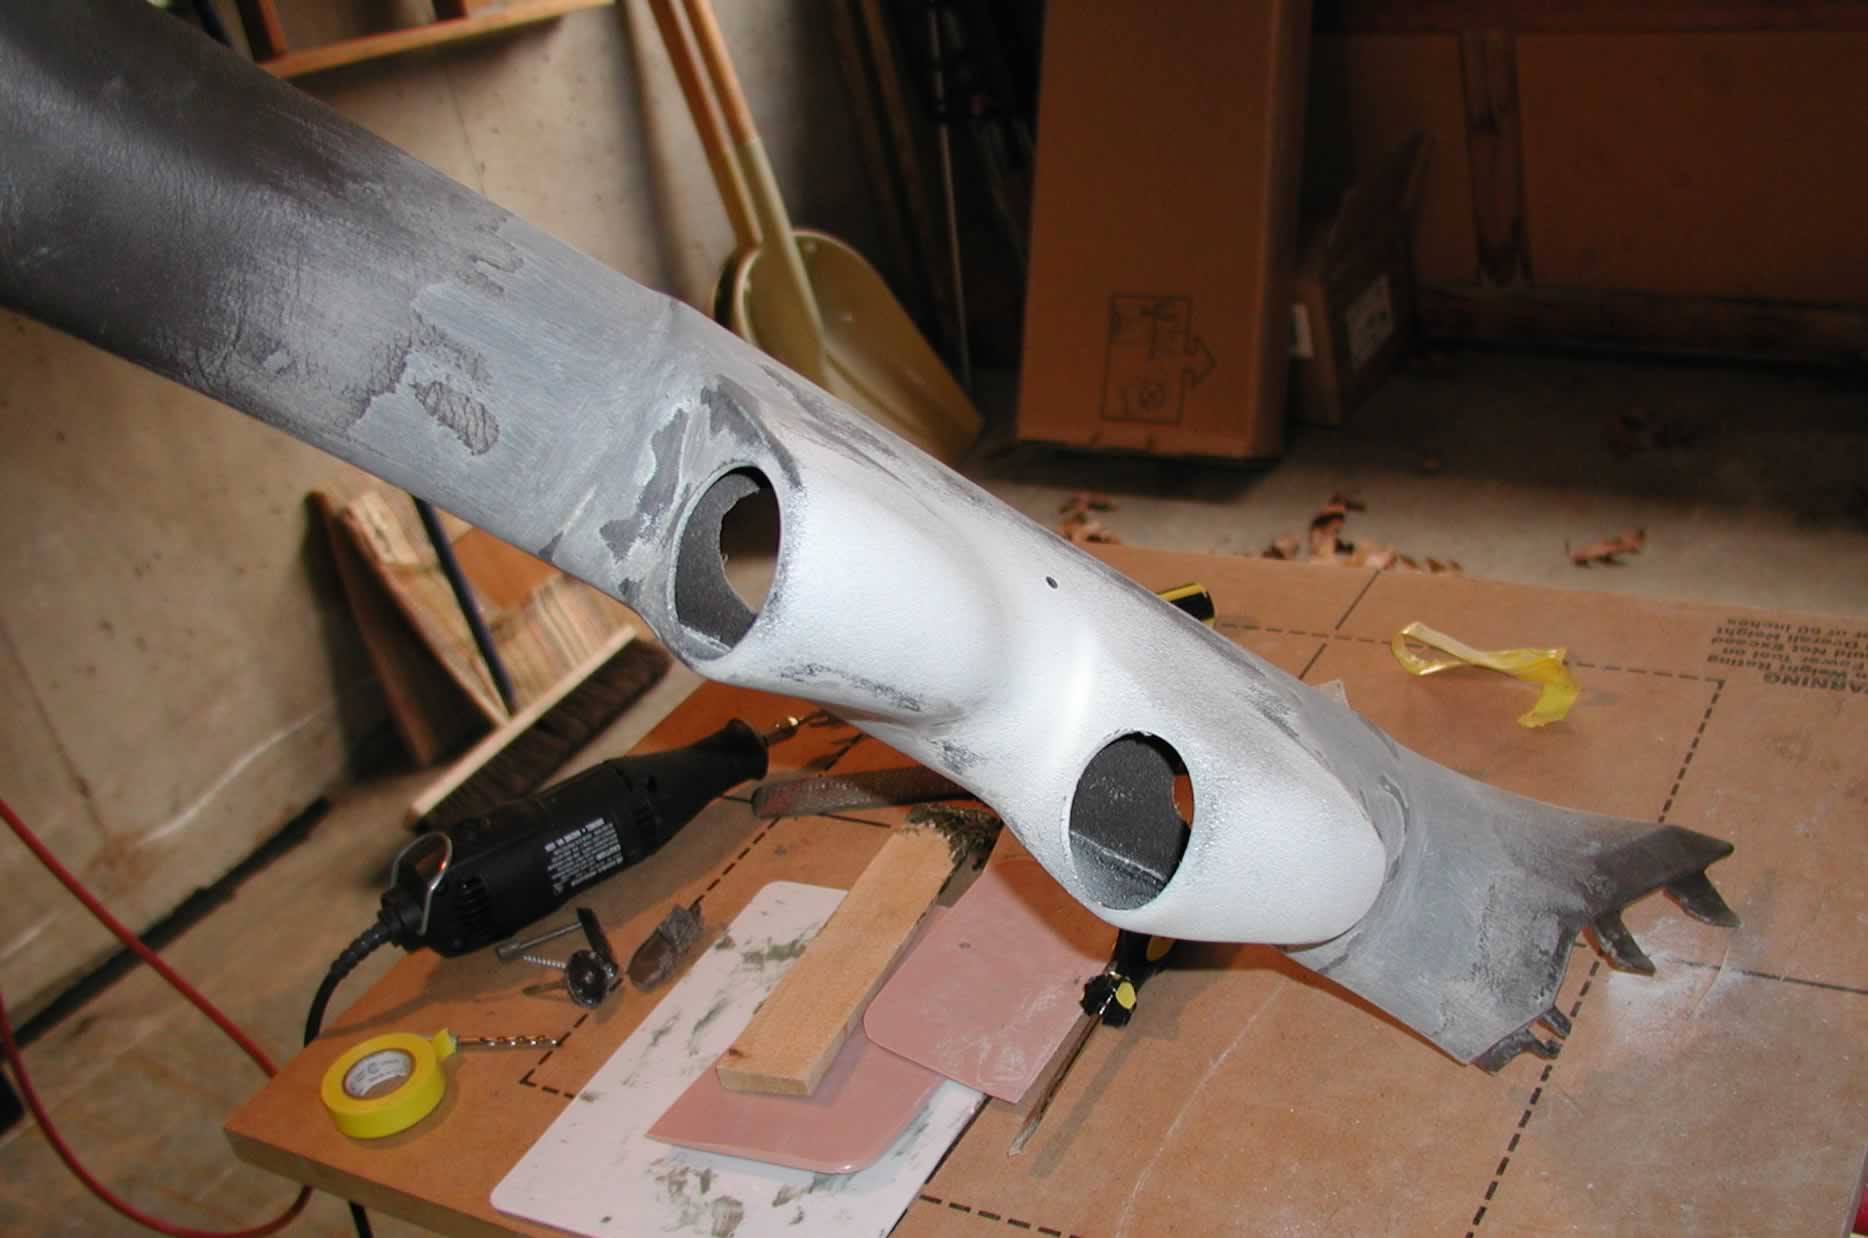

After a couple more passes with the filler and sanding with #80 grit sand paper, it was begining to look even better. In case you didn't notice, I've already pulled the screw hold the parts to the scrap wood. The fiberglass filler is now holding the pod to the trim very securely. Now I need to mix up one more batch and fill the screw hole and do any last touch-up necessary.
 Now I am ready to go through
the varying grades of sand paper to get a nice smooth finish before priming.
After shaping with the #80 sand paper, I go to the #180 and then the #220 grits.
I never went to the #400 grit paper. It didn't seem necessary. With each grit,
I made sure to hit every area before moving on. You shouldn't be able to see
the scratches and gouges in the body filler. The filler should provide a nice
smooth transition between the pod and the trim piece. I ran my fingers over
the areas where the two pieces met to be sure it felt good and smooth. Be aware
of any low spots that need more filler or areas that need more sanding. Be sure
to take care of those before moving on. Fixing them now is a lot easier than
later!
Now I am ready to go through
the varying grades of sand paper to get a nice smooth finish before priming.
After shaping with the #80 sand paper, I go to the #180 and then the #220 grits.
I never went to the #400 grit paper. It didn't seem necessary. With each grit,
I made sure to hit every area before moving on. You shouldn't be able to see
the scratches and gouges in the body filler. The filler should provide a nice
smooth transition between the pod and the trim piece. I ran my fingers over
the areas where the two pieces met to be sure it felt good and smooth. Be aware
of any low spots that need more filler or areas that need more sanding. Be sure
to take care of those before moving on. Fixing them now is a lot easier than
later!
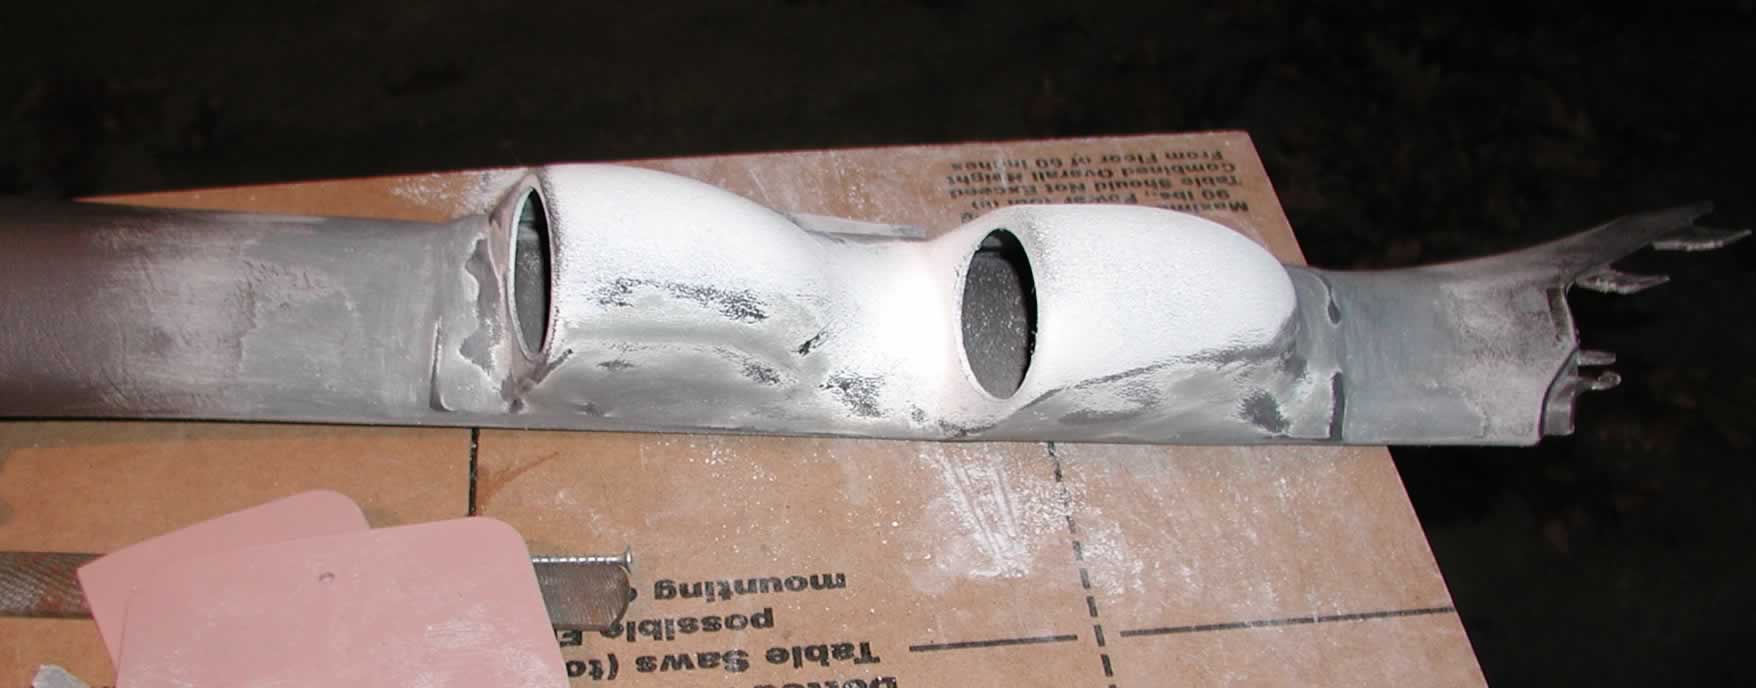
 Here's the piece after priming.
Though you cannot see it in this picture, the transition is smooth and makes
it difficult to see where one part ends and the other starts. Tomorrow I paint
with the paint from the wallpaper store that was computer matched to the original
trim. I will be using a sponge type paint brush. This way I can daub it on and
try to get that textured look (like on the OEM trim).
Here's the piece after priming.
Though you cannot see it in this picture, the transition is smooth and makes
it difficult to see where one part ends and the other starts. Tomorrow I paint
with the paint from the wallpaper store that was computer matched to the original
trim. I will be using a sponge type paint brush. This way I can daub it on and
try to get that textured look (like on the OEM trim).
For those with Oak interior (like mine), here's the paint codes they used to mix my paint:
BB24
BR2X1
OY12
BK16
RX2
WH28
The paint base was Benjamin Moore Satin Impervo Ultra Base. There was a little shine to it after painting. In direct light, it sticks out. Get it flat instead. But when it's mounted, there is no direct light hitting it so it really doesn't matter.
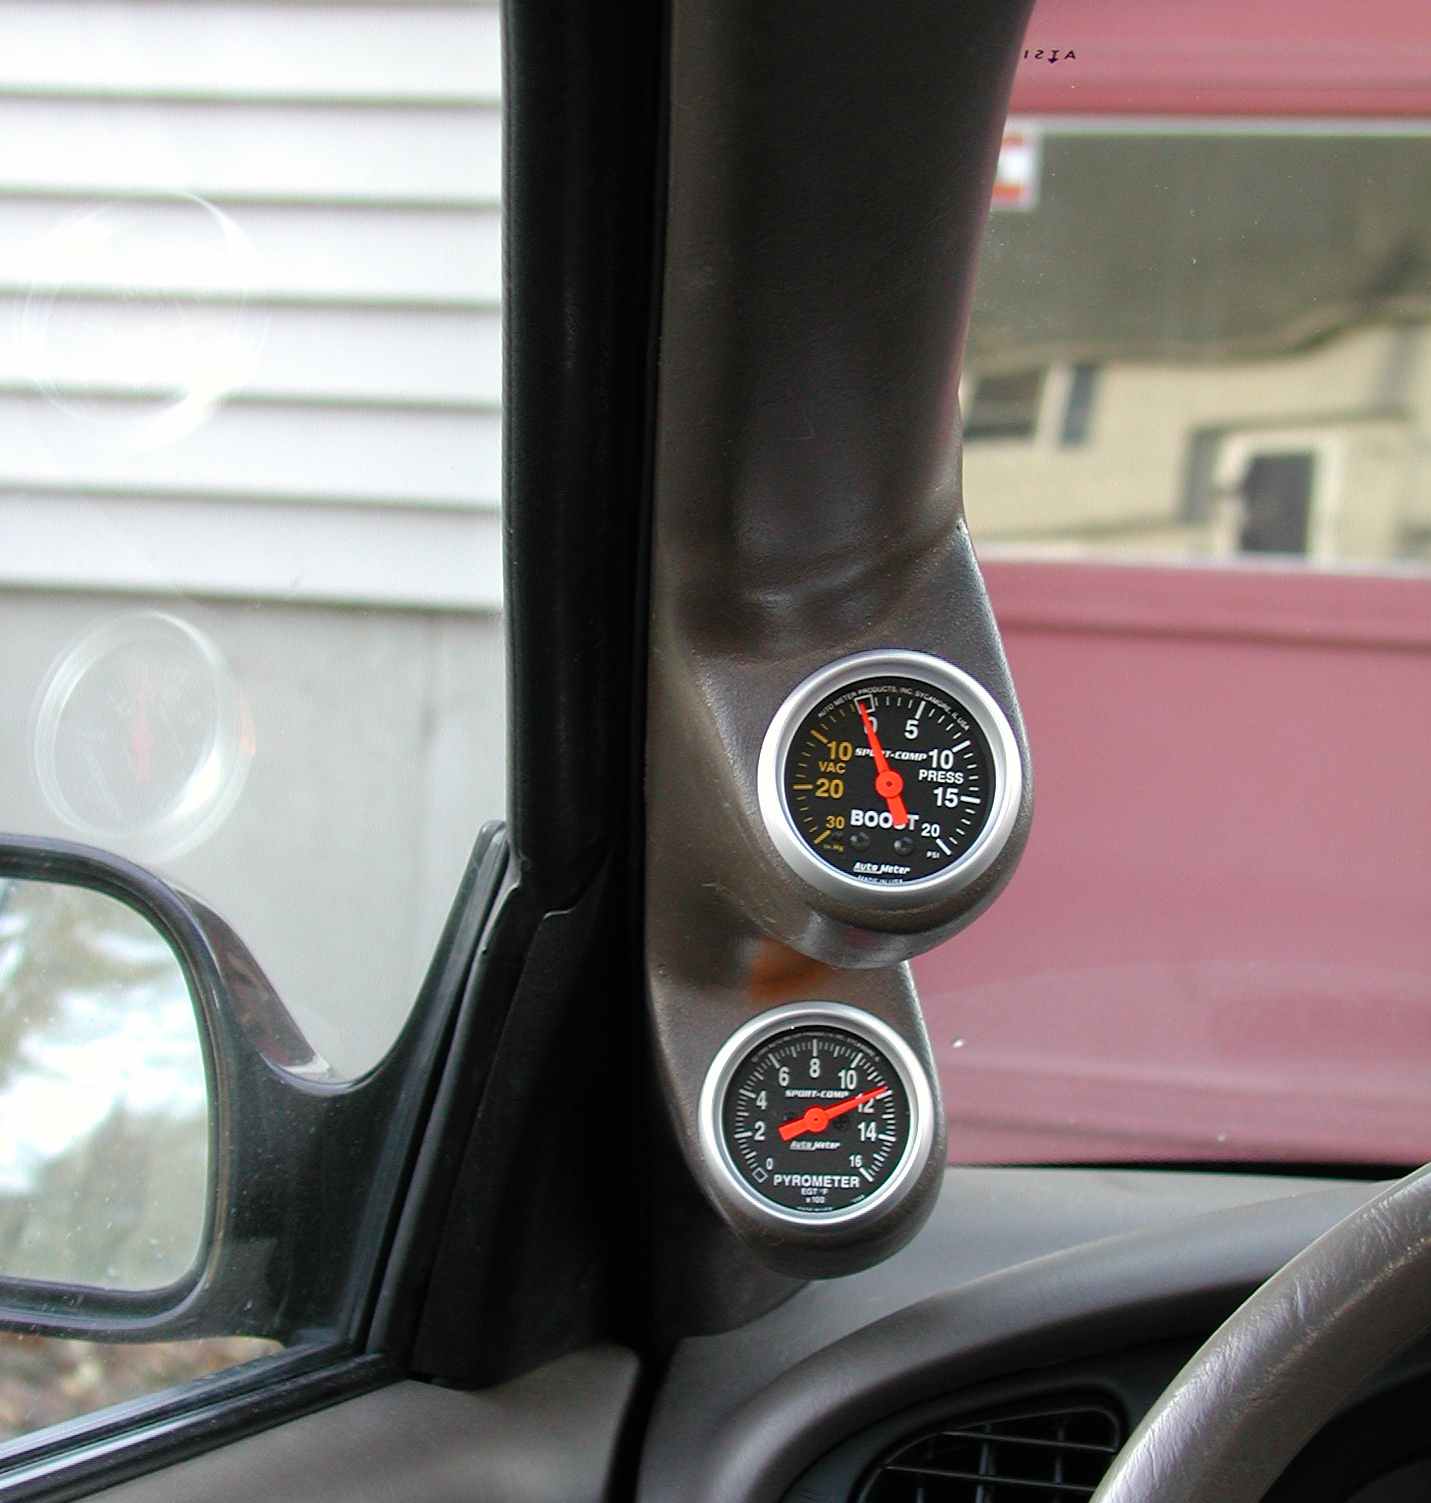
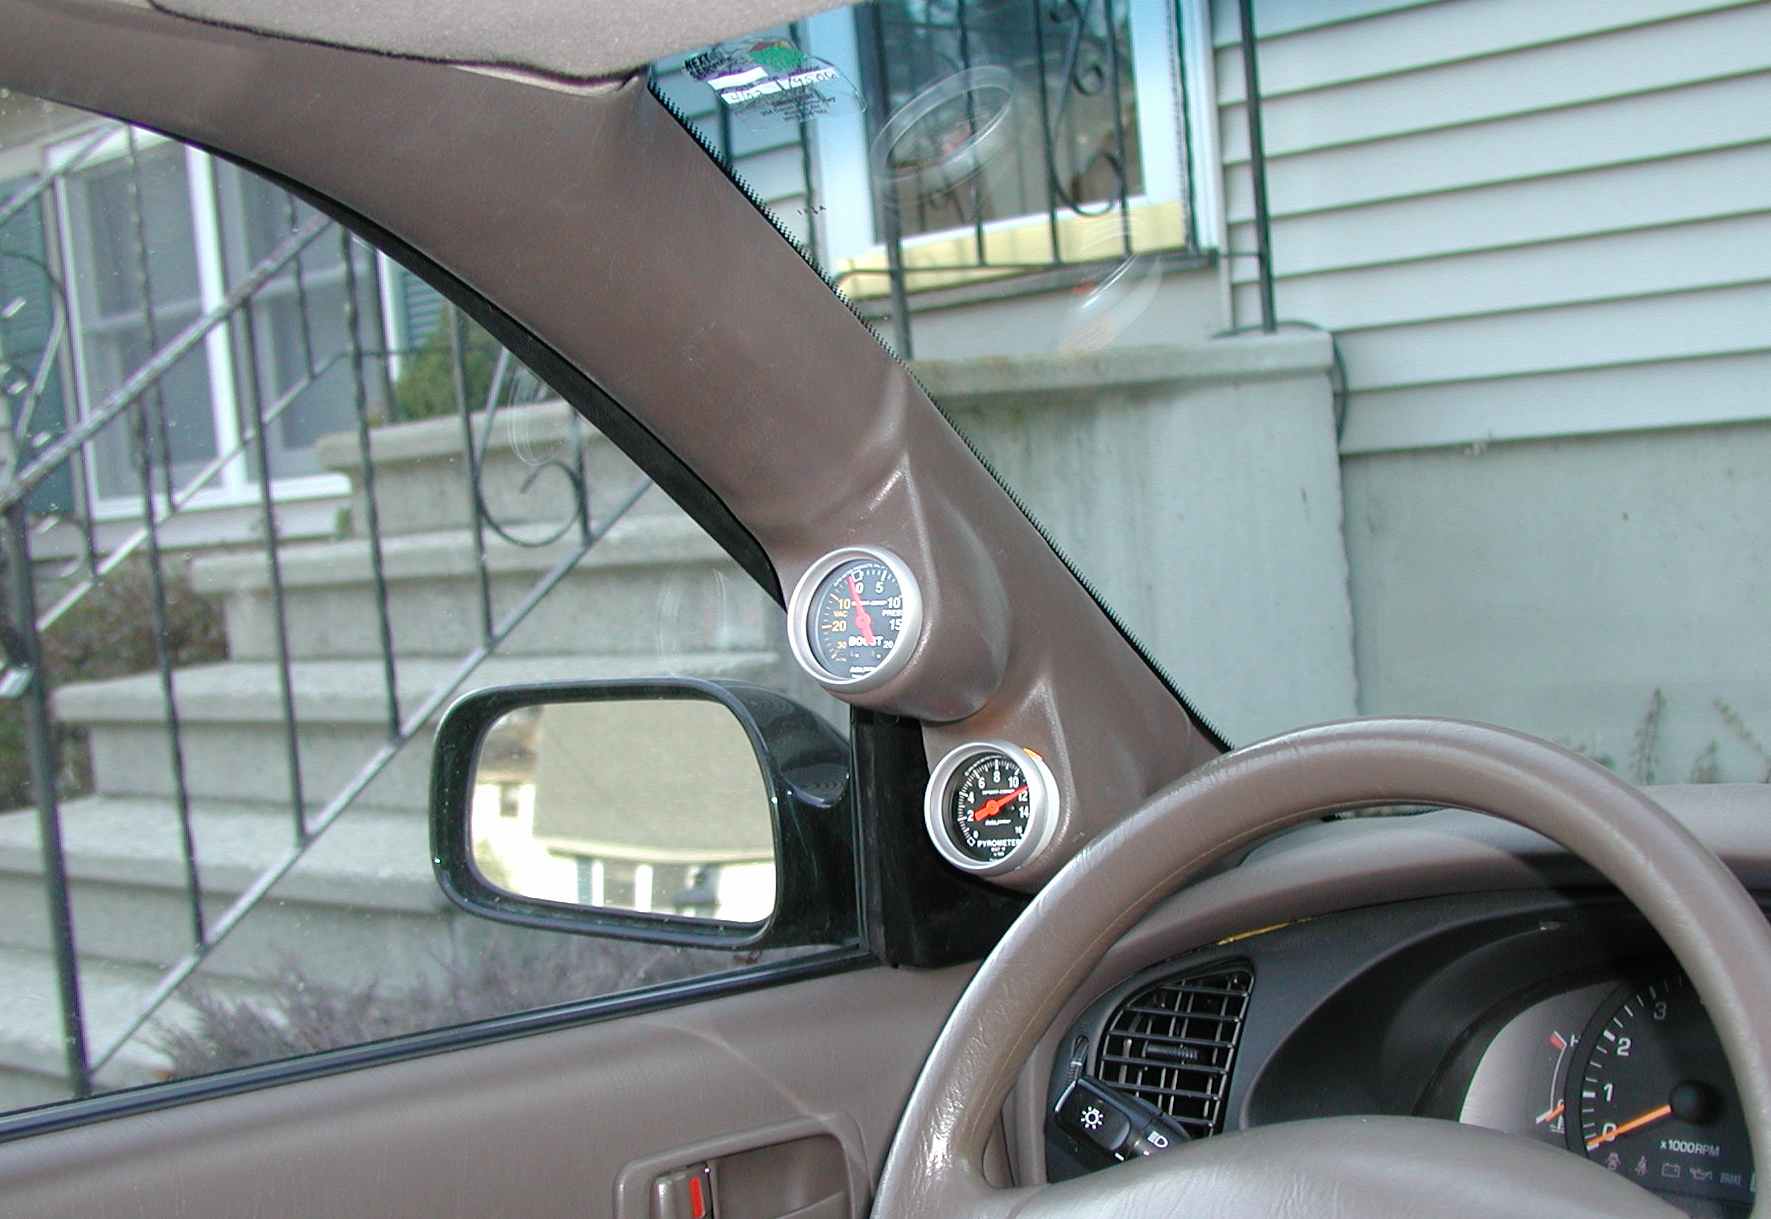
Final pictures after painting and installation: